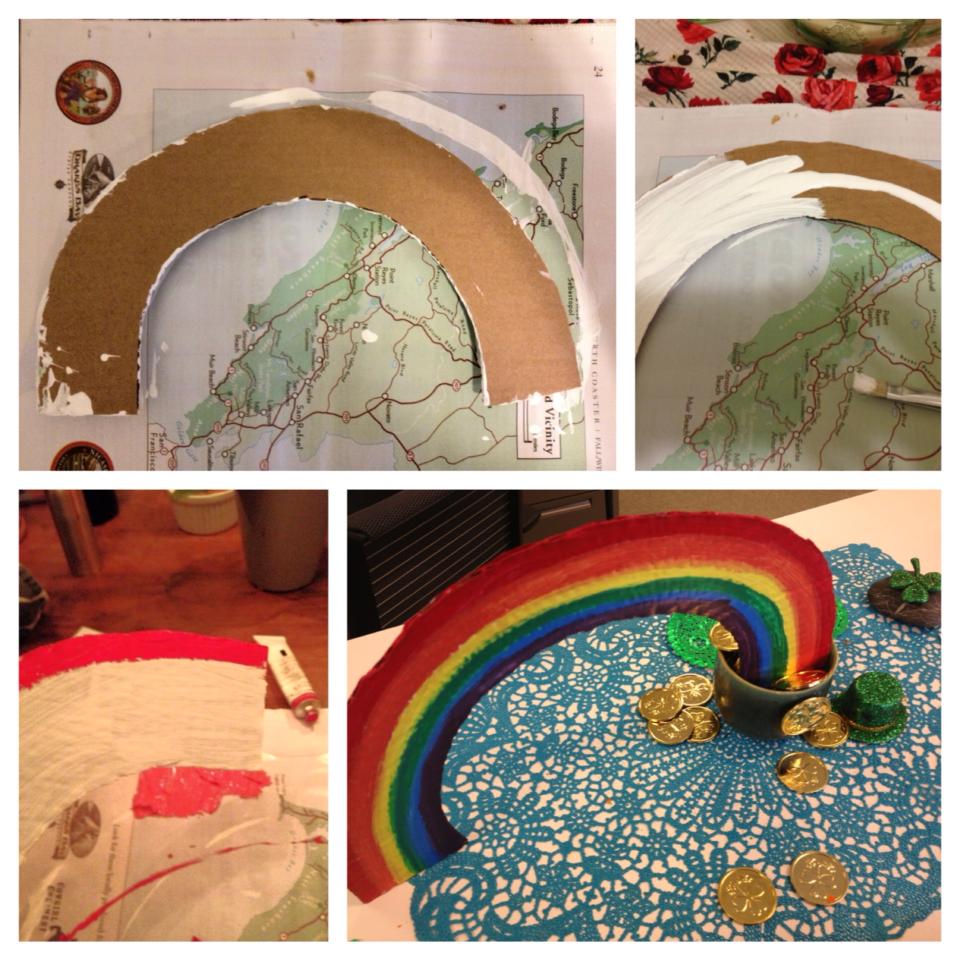
Step 1: Bug out - about whatever. There's nothing quite like it to accelerate rainbow making.
Step 2: Search your collection of cardboard scraps for the perfect size and weight.
Note: cardboard should be much larger than actual rainbow.
Step 3: Take proper measurements and make sure to establish appropriate scale (e.g. make sure end of rainbow fits securely in already created pot of gold).
Step 4: Sketch and cut out. This is the most satisfying of all steps. Particularly if you let the shape be a little wonky.
Step 5: Prime both sides of the rainbow to ensure brilliant future colors.
Note: this step takes patience. You'll put too much paint on. It will be lumpy and buckle. Then you'll have to wait a day to paint the other side since a rainbow must be two sided. It does not however have to be perfect. The lumps and warps will give it character.
Step 6: Assemble brilliant colors and paint. On both sides.
Note: As you might recall from rainbows of your youth, there is never enough space for each color no matter how much you try. Give up. Let them bleed. They'll find their own edges.
Step 7: Admire your work. You just created something magical.
Step 8: Find a home for your rainbow. Make sure others can see it. 'Cause there's nothing quite like seeing an unexpected rainbow.
